Tuesday, 25 March 2014

Motion Graphics Companies

In this post I will be looking further into the subject of motion graphics, this time examining the companies that make money out of producing them for others. Below are companies that I have found, each section summarises them and also shows examples of the work they produce.


1. Bexmedia http://www.bexmedia.net/
Bexmedia are a motion graphics company established in 2008 which work with local and international clients. Although they do normal motion graphics, the company specialises in using them for things such a presentations.
Below is an example of a motion graphics video they have produced in the form of an informative and promotional clip. In this they have combined simple motion graphics and typography with live action video.

https://www.youtube.com/watch?v=kItAN6vaUbo


2. Hurricane Media http://www.hurricanemedia.co.uk/
Hurricane Media are a specialist video and animation company, unlike the previous examples who also involve themselves in other aspects of art such as illustration. They have been established since 2005 and produce high quality motion graphics as a form of advertising for many companies. Again in this example they used a combination of real time footage with effective and subtle bits of animation and effects.


3. Bean Box http://www.beanboxanimation.co.uk/ Bean Box animation produce not only the common 3D motion graphics, but also create 2D animations.They specialise in:
-3D product motion graphics
-3D architectural motion graphics
-3D motion graphics for education
-2D motion graphics for websites
-2D and 3D idents
Here is an example of a motion graphics advertisement for Nokia. https://www.youtube.com/watch?v=nXsLnIVfUaI


4. Shoot You Video Production http://www.shootyou-motion-graphics-production.co.uk/
Shoot You are a company that specialise solely on producing quality motion graphics. Their motion graphics have quite a modern and technical theme to them, some videos both using live action alongside normal digital work, whilst other rely on animation alone. To view an example of their work please visit this link:
http://shootyou-motion-graphics-production.co.uk/portfolio-motion-graphics-london.php#prettyPhoto/0/


5. Column Five http://www.columnfivemedia.com/ Are a large company which produce a wide variety of mediums, not only motion graphics. They offer services in illustrations, presentation designs, digital PR, infographics and many more. To see examples of the motion graphics they have produced visit their portfolio page here: http://www.columnfivemedia.com/work-types/motion-graphics


After researching the companies for this blog I have found that there aren't many large companies that solely concentrate on the production of motion graphics. Many of them integrate other services a long side. There are a small number of specialised comapnies, but each one seems to have a genre in which they create within.

Sound Production in Animation

In this post I will be examining the different areas of the sound production pipeline. Sound is as important in animation as the visuals, without sound the on-screen events may not make sense or may not portray the correct emotions of the scenes. The production of sound is a long process, but this is necessary as bad sound can ruin an animation.

Stages of sound production:

Scripts-
Scripts are the first part of sound production, they contain information on the animation the sounds are required for. Scripts give the feel of scenes which relate to the types of sound made, but mainly scripts are produced with dialogues for voice actors to follow. There will be a few script writers working on the animation, ensuring that the dialogue is in-keeping with the story, but they also add details on how the characters are feeling or if a sound effect (such as a glass smashing) can also be heard and when.


Foley-
Foley is the production of audio for animation, such as footsteps and everyday sounds. This is needed as there are no such sounds when using animation software unlike films where actor's footsteps would be recorded during filming. Foley sound is used to add a new dimension to the film but also to make it as realistic and relateable as possible. It is required to create and set the scene for the viewers. It is also used to enhance sounds that may not be easily heard either. During foley the person making the sound can use a variety of every-day objects and instruments to create realistic and humerous sounds. For example there is never usually a sound in real life if an object is falling, however in many cartoon programs a sound (much like a flute) can be heard to emphasise factors such as the speed of the fall. Another example of foley exaggerating a sound is in the film 'Cloudy With a Chance of Meatballs', the falling hamburger scene is a good example. This link is a video showing how foley is produced https://www.youtube.com/watch?v=d-WhK6qQppY


Dope sheets-
Dope sheets are one of the most important parts of sound production, this is the main planning area and is important for proper recording and synchronisation of the sounds. A dope sheet can range from being very simple to very complicated, this decision is based on a variety of factors. A dope sheet lists every single frame of a scene (and eventually the entire animation), some frames have no sound. In the next column the dialogue is listed, for example from frames 10 to 20, the word 'hello' could be said. The 'h' would be placed at frame 10 and last for as many or as few frames as needed, this same process would be followed for the following letters. Depending on where the letters are placed in accordance to the frames the word will change in the way it is said. This planning allows synchronisation to be produced effectively as the animator knows that at frame 10 the character's mouth must be in the correct shape to make it believable. This is where a third column may be added, this shows the phoneme that relates to the sound that is being created. Some animators write the sound, whilst others see how their mouths move in a mirror and draw each shape for each letter. This is also useful for reference when producing the shapes of the character's mouth. Many other columns can be added if required, they could be used to show other characters speaking, or perhaps show when other sounds may occur.
 
Recording-
Once the dope sheet is produced casting begins to find appropriate voice actors. They are required to speak a particular speed following the script and dope sheet, however this can be edited in special sound software to fit the correct number of frames in post production. This is why the dope sheet is so important. The dialogues are recorded many times in a variety of speeds, emotions and voices until the correct one is established. This is also done so that different parts of dialogue can be composited over another if is required. Below is an example of the recording of voices.


Syncing-
This is one of the final areas of sound production, and is the most important. If this is not done properly then it can ruin an entire animation and leave the audience viewing a very unprofessional product. Syncing is not only important for the dialogue and voices, but is hugely important for any foley sound effects and composed music. The dope sheets are again used at this stage, the sound producer and animators ensure the sounds are in sync with the correct frames, however it can be edited at this stage if things do not have the desired sound.


Production for 3D Animation

This is the last animation production I will be summarising, unlike the previous two (2D and Stop Motion) the processes for 3D animation are longer, with more steps. Some stages are similar to that of the methods in stop motion, but they are in different order and require different techniques.

Step 1: Modelling
Unlike stop motion, the first step is to model the object or character that is required to be animated. The modeller creates a 3D model using a specialist software such as MudBox, ZBrush, Cinema 4D or Maya. The 3D model is done to a high accuracy based on the final concept design from the pre-production stage.
Depending on what the model is required for it may be of low or high detail, for examples films will be higher and games although detailed may be a bit more limited due to the need for programming.


Step 2: Rigging
Rigging comes in after the modelling is completed and finalised. Rigging is the digital version of armature that is created during the stop motion stage. A different person or team to the ones modelling are in charge of rigging as this involves more technical ability. Rigging is a time consuming process as it involves building and placing all the skeleton and armature. It must also be weighted to ensure the corresponding limbs move correctly and also needs to be programmed.


Step 3: Texturing
Once the model has been completed, it is then necessary to add the texturing, again this is based off the final concept design achieved in the first part of production. Texturing is also completed by a separate team of people, some textures are pre-made, however sometimes a separate texture artist is required to create specialist materials. Texturing involves not only adding colours, but also requires the replication of materials such as clothing and metal. Texturing is also used for hair, skin and all the details of a scene. If it is not done well texturing can ruin the models that have been produced.


Step 4: Add Lighting
Lighting is an important part of an animation. Lighting helps to create and make things appear more realistic, it also helps to create a specific atmosphere depending on the scene. A lack of lighting can also undo the previous stages as it can make the models appear less 3-Dimensional, this could happen due to the lack of shadows as these are what create the shape to our eyes. Lighting is generally achieved during the production in Cinema 4D and Maya, however atmospheric lighting may also be added in the compositing stage of post-production.


Step 5: Key Framing
Key framing is the same in 2D animation, except once the main movements have been keyframed the inbetween frames are automatically generated by the software. For example, for a walk cycle the first key frame would be the character in a standing position, whilst the 2nd position would change to the next main position. Key frames may be planned out before being put into the system.


Step 6: Animation
This is the most important part of the production stage, if previous stages have not been completed to the right quality it will be obvious now. The animator uses the rigged and programmed model to create a series of separate key-frames which can be linked together and produce a fluid animation. This is done by using different controls on the rig and making them pose in a particular way. This is also the stage where other elements such as the camera are moved and key-framed.


Step 7: Render
Once the animation is running correctly after numerous checks and run-throughs, it is time to do the final render. This means the file is exported into a final film file and allows all the elements such as the textures and the movements to be combined into the complete product.

Production for 2D Animation

In one of my previous blog posts I summarised the pre-production process in all areas of animation. For the production stage I have decided to break my posts down into three: 2D, 3D and Stop Motion animation. I have done this as the processes of production are different in each one.

Step 1: Keyframes: Keyframes are an important part of visualising how an animation will pan out. All parts of animation are linked together in 'frames', each has a movement which when combined together creates a seamless transition. Keyframes represent the main movements rather than the frames in between. They act as basis to build the rest of the animation on.


Step 2: Animation:

This part of the production is the final part before the elements of post-production begin. At this stage, all the key frames and frames that have been created are linked together. Depending on where the 2D animation is produced, the techniques will be different. 2D can be achieved traditionally or digitally. If it is done with the traditional techniques using pencil and paper, each piece of paper will be photographed in order. This will then be transferred into a program such as Adobe where the photographs can be linked together. If it is done digitally using programs such as CorelDRAW and Adobe, each layer or file represents the frame, this saves time as they don't need to be photographed separately and only require being combined together.


Production for Stop Motion Animation

Like the 2D animation post, this one looks at the stages of production within the Stop Motion animation pipeline. This notably has more steps to it, and the order varies compared to the 3D animation which I will be looking at last.

Stage 1: Armature
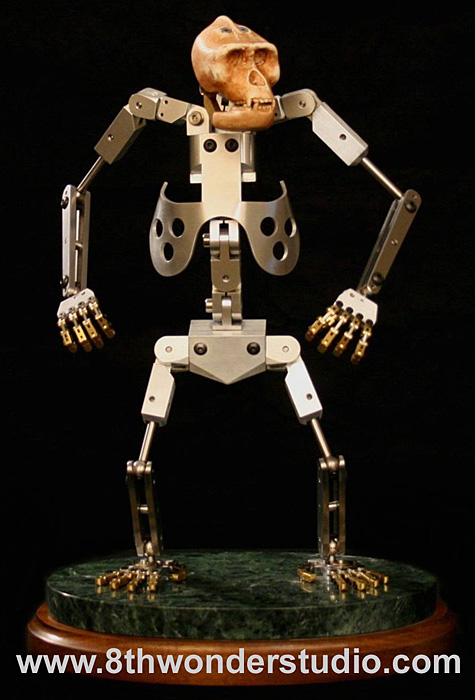
Armature is very similar to the rigging stage in the 3D animation process, except of course this is a physical object rather than a 3-Dimensional one on the computer. The armature is built using wire and a variety of mesh materials to create the joints to allow parts of it to move and also acts as a secure foundation to build upon. Without armature the structure would be unstable and unable to easily be animated.


Stage 2: Modelling
Modelling comes after the armature, again this is the same as the 3D animation, but is done in a different order. Plasticine or malleable clay is usually the choice material as it doesn't dry out and can be moved in any direction without the worry of it breaking. This is built up and around the base mesh as a template in layers until the desired character or set is completed.


Stage 3: Lighting
Lighting is next, again this helps to create the atmosphere of the piece. Lighting is also important for setting the scene, such as the time of day; soft orange lighting therefore gives the illusion of sunrise or the Summer. Lighting is also needed to help bring things to life and making them more believable, this is achieved by the addition of shadows and highlights.


Stage 4: Animation
Animation is the final part of the stop motion process. This is a time consuming part as the animator must move each piece of armature a small amount at a time whilst photographing each frame. The more minute the movements the smoother they will appear on play back. In scenes that require characters to talk, the animator may be required to change and replace parts of the face in order to show mouth movements and believable emotions.

Wednesday, 11 December 2013

Pre-production for Animation

Pre-production in any animation is the most important stage. Without proper and detailed planning the rest of the project is vulnerable to not meeting the standard that is required, resulting in mistakes and a loss of time and money. There are many parts to play in pre-production, there are around 7 notable areas that are going to be summarised in this post.


1) Story Arcs
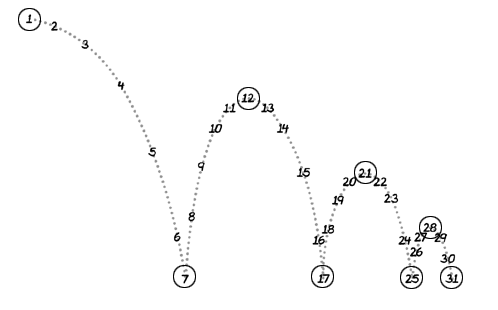
Story arcs are a visual method of forming the main points of a story line. There are two examples of a
story arc to the right of this text. As it can be seen, the line represents the whole plot and the points where it rises and falls are used to show the main turning moments that effect the story significantly. Story arcs are created by the main writer for the game/film. When looking through some animation examples there was only one writer for Batman: Arkham Origins; Paul Dini. When researching a larger film such as Monsters Inc there was only a team of four Pete Docter, Jill Culton, Jeff Pidgeon and Ralph Eggleston. This shows that this isn't a large sector and is highly specialised.


2) Scripts
Scripts are an important part of any animation, especially those with voice actors or subtitles. Scripts not only present the dialogue that needs to be recorded, but they also contain notes that inform the voice actor what is needed from them. Scripts also help to create the feel for the animation and are used in the production of animatics in order for the animators to see if the timing of the voices, movements and overall scenes is right. This then allows the script or the animation to be adapted, saving valuable time and money further down the production pipeline.


3) Mood boards
Mood boards are the first part of planning for the visual aspects. A mood board is a collage and variety of many different thing ranging from pictures and text. The mood board artist draws on inspiration and ideas from their own imagination or from other artists and animators.
                           

4) Concept Art
Concept art is a term used to cover all the design work within a project, it covers a range of areas from character and environmental design to level design in games. It is the next step after the mood board. They are required in order to give the production team a base to work from and allow the director of the project to clearly plan out their ideas. Concept art not only creates the blueprint designs, but the level and environment artists are also required to create moods within their pieces to create the feel for the scene. Concept art is also used in the final designs, where they are also sold as merchandise.


5) Storyboards
Storyboards are self explanatory, they are created to tell the story of what needs to be produced. Each frame does not require drawing, although there has to be enough frames and enough detail in order to make sure the information is clearly transferred. Storyboards show placement of characters, when they speak, their emotions, and also the staging elements such as where the camera is situated in a particular scene.


6) Animatics
Animatics are very similar to storyboards. The pictures from a storyboard are inserted into a program to form a small film. It is then played and it then allows the director and the artists to judge timing, whether or not scenes need to be extended and cut and whether or not dialogue would work. This is vitally important, especially when it comes to TV series which have to fit into a particular time slot.

Despicable Me

Family Guy


7) Dope Sheets:
Dope sheets are a tool used by animators in order to write down their ideas into a structured and organised way. Dope sheets are used for the entire length of the production, with each scene broken down into detailed separate frames. Each row represents the frame, while the columns along the top of the page represents different information ranging from where the camera is at certain points, to the dialogue and how it is said.


Sunday, 8 December 2013

Motion Graphics Deconstruction: Cineworld Advert 8/12/2013

After recently going to the cinema, I came across another good motion graphic so I decided to go with this one for my next deconstruction. For some reason blogger couldn't find the video when I entered the URL, so if you haven't seen the clip already you can view it here: Cineworld Graphic.

This motion graphic is a mixture of two things, it gives a little bit of information about what is coming next on the screen whilst also telling the viewers in the cinema to turn off their phones. It's done like this as the advert is only 19 seconds long, this means it gets to the point and keeps the attention of the audience. It is also meant to be done with the intent of a bit of humour, which is also engaging for viewers. At the end of the clip it also advertises Cineworld cinemas as a reminder of where you are.

This is a motion graphic that is rich in sound, unlike some of my previous blogs where I have suggested that the sound is merely there to compliment the animation, I feel like the sound brings more emphasis to this clip. I think it would be quite clear what was going on without the sound, but it wouldn't have such an impact and you obviously wouldn't be able to hear the information that isn't visually represented on the screen. There is music that can be heard in the background of the animation, it's quite jolly and subtle which goes alongside the cheerful 2D cartoon visuals. There are also diegetic sound effects for the boat where it blows out the certification bubbles. These little sounds just help to bring the animation together. Then the voice over can be heard, even he has quite a cheerful tone, he is used for information purposes about the certification, trailers and the main point of this animation which is to tell people to turn off their phones. As he tries to inform the audience he can be heard trying to talk over laughing that slowly gets louder and louder. The laughing comes from the little phones at the bottom of the screen to show how annoying it is to have phones on during the cinema. The music stops as he tells them to shush and starts again with a joyful little ending as they walk off. I feel the sound effects just bring light to the situation whilst also being effective in giving information. The way it makes the phones louder as the animation goes on also helps to in still the information about turning phones off in the cinema as it is makes the viewer slightly frustrated if they are trying to listen to the voice over information.

Throughout the animation there is quite a lot going on for such a short clip. The clip is very bright and cheerful in its colour scheme as well as the cartoon style of drawing. The hot air balloon/boat is cleverly done, by incorporating a projector and film clipboard to relate to overall theme of film and cinema. This is shown to be producing bubbles with little certification icons. The certification icons are kept encased in the bubbles which draws attention to them in a more creative way. The camera then pans down into a cinema as the background, with two phones who are both communicating with each other in the foreground. The animators have managed to create characters for  the phones by their overall actions and their facial expressions. When they have been told to be quiet they look shocked, their faces then change to sad and grumpy expressions which shows how they feel. Their bodies are also made to slump with arms crossed which helps to support their reactions to the voice over. The whole animation isn't very fast paced, with the camera rarely moving position. The sounds are all in sync with the visual aspects which makes the animation more pleasurable to watch. At the end the clip fades out to reveal the Cineworld logo, this is the only real bit of typography throughout, the white on black background makes it stand out well and easy to read. Overall I think this is a very neat animation as it is very rich to watch and to listen to, I like that it sticks to one theme so there is no confusion for the viewer about what they are watching. The whole style is there to engage and be appealing to all age groups and I think this is achieved well.